In a world brimming with technology and fast-paced living, there’s something wonderfully grounding about engaging in traditional crafts.
Weaving, an ancient and practical skill, offers not only a connection to history but also a meditative and creative outlet for both adults and children.
In the book “Live Like a Viking,” we find a beautifully simple and accessible introduction to weaving using a cardboard loom, which we’re happy to be able to share with you all.
This activity is perfect for those looking to explore the art of loom weaving without needing elaborate tools or materials.
The Art of Weaving: A Viking Tradition
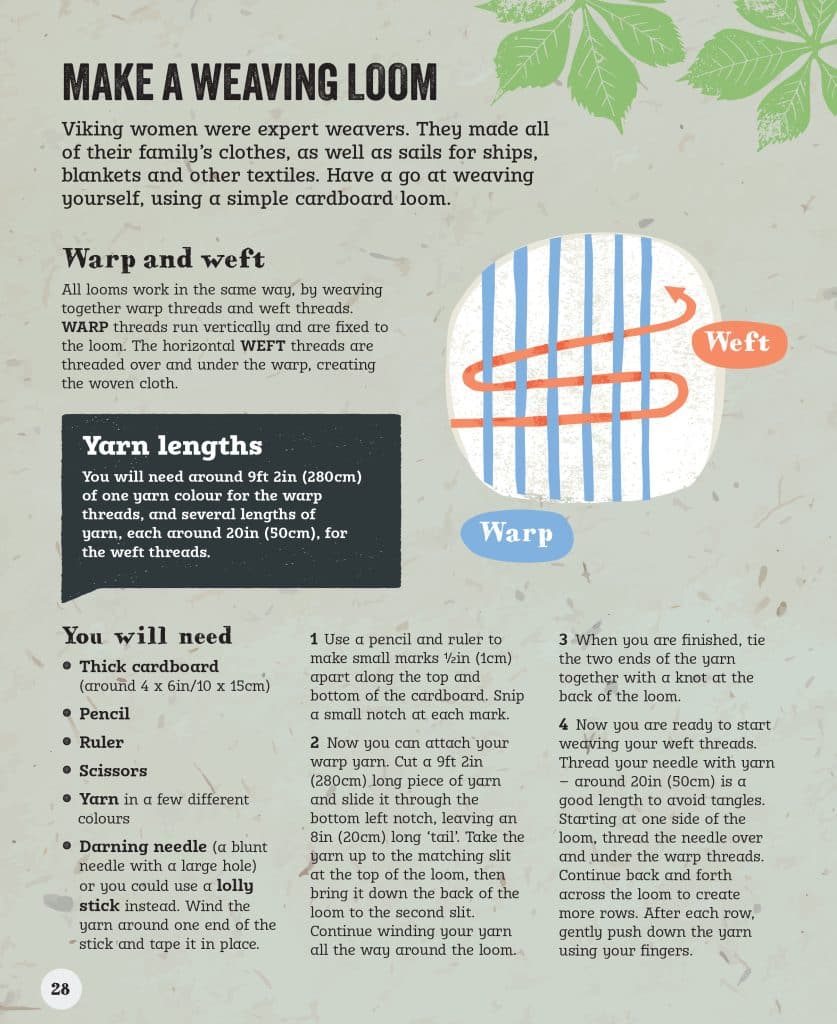
Viking women were expert weavers. They made all of their family’s clothes, as well as sails for ships, blankets, and other textiles. Have a go at weaving yourself, using a simple cardboard loom.
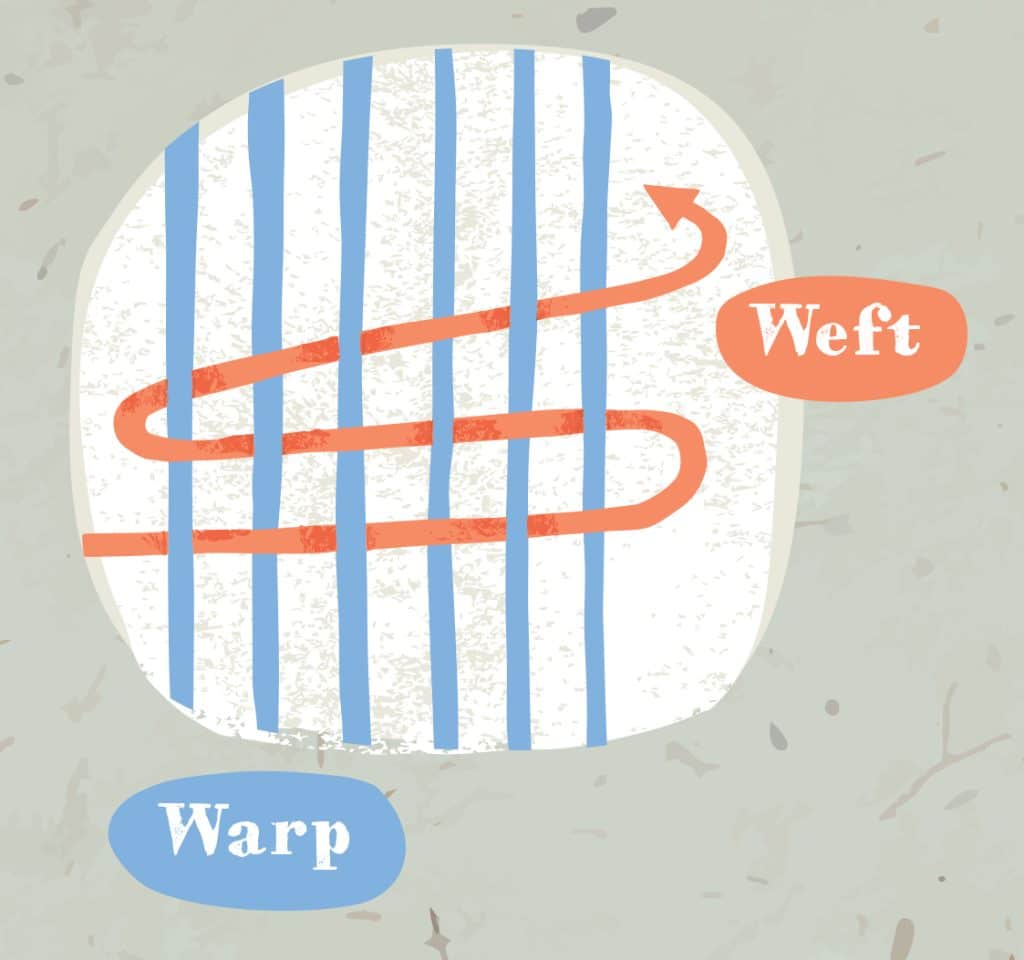
Warp and Weft All looms work in the same way, by weaving together warp threads and weft threads. WARP threads run vertically and are fixed to the loom. The horizontal WEFT threads are threaded over and under the warp, creating the woven cloth.
Yarn Lengths You will need around 9ft 2in (280cm) of one yarn colour for the warp threads, and around 20in (50cm) of several yarns for the weft threads.
Make a homemade Weaving Loom
Discover how to make a weaving loom with our simple guide! Learn how to build a loom from scratch using basic materials. Our homemade loom plans will have you crafting in no time.
Whether you're looking to build a weaving loom for a fun DIY project or want to dive into loom making, we've got you covered. Perfect for kids and adults alike, this homemade loom is the ideal way to explore the art of diy weaving.
Make your own loom today and start creating beautiful woven pieces!
Materials
- Thick cardboard (around 4 x 6in/10 x 15cm)
- Pencil
- Ruler
- Scissors
- Yarn in a few different colours
- Darning needle (a blunt needle with a large hole) or you could use a lolly stick instead. Wind the yarn around one end of the stick and tape it in place.
Instructions
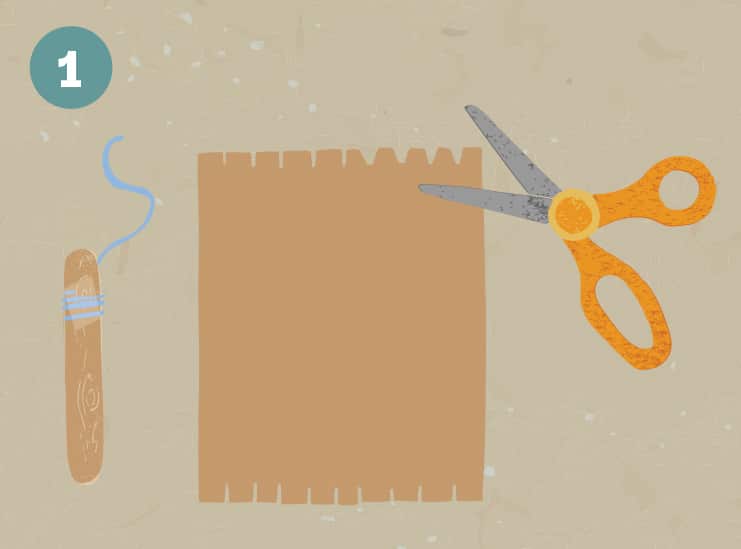
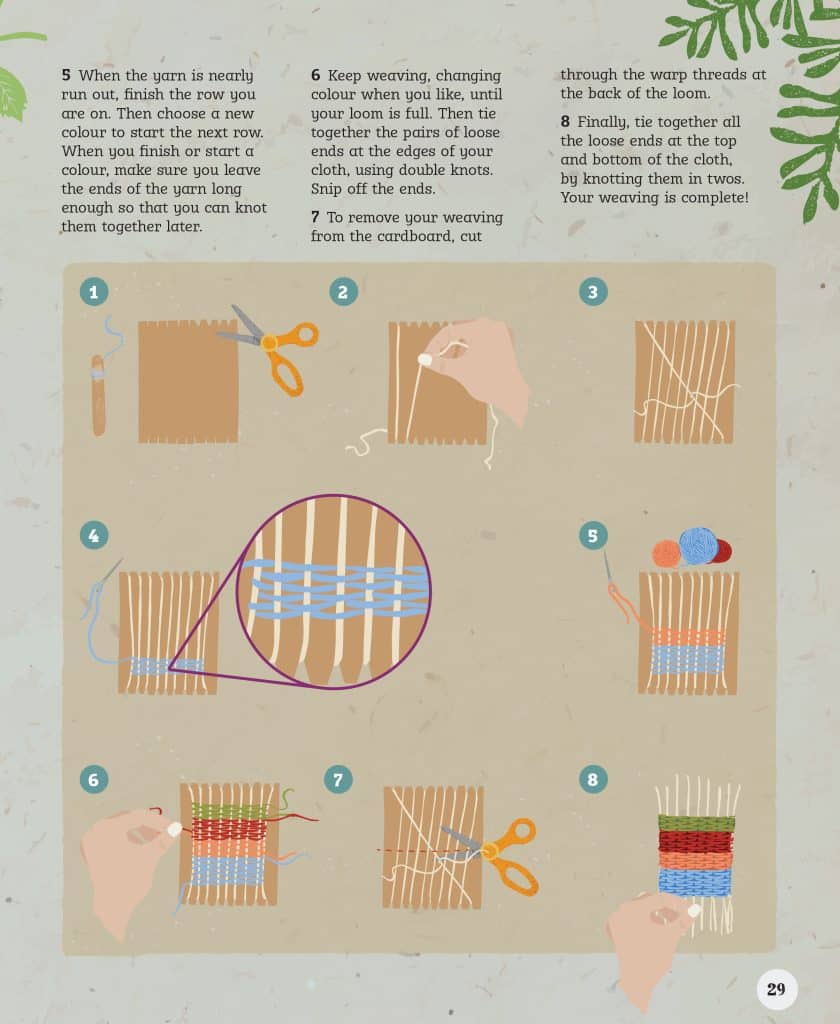
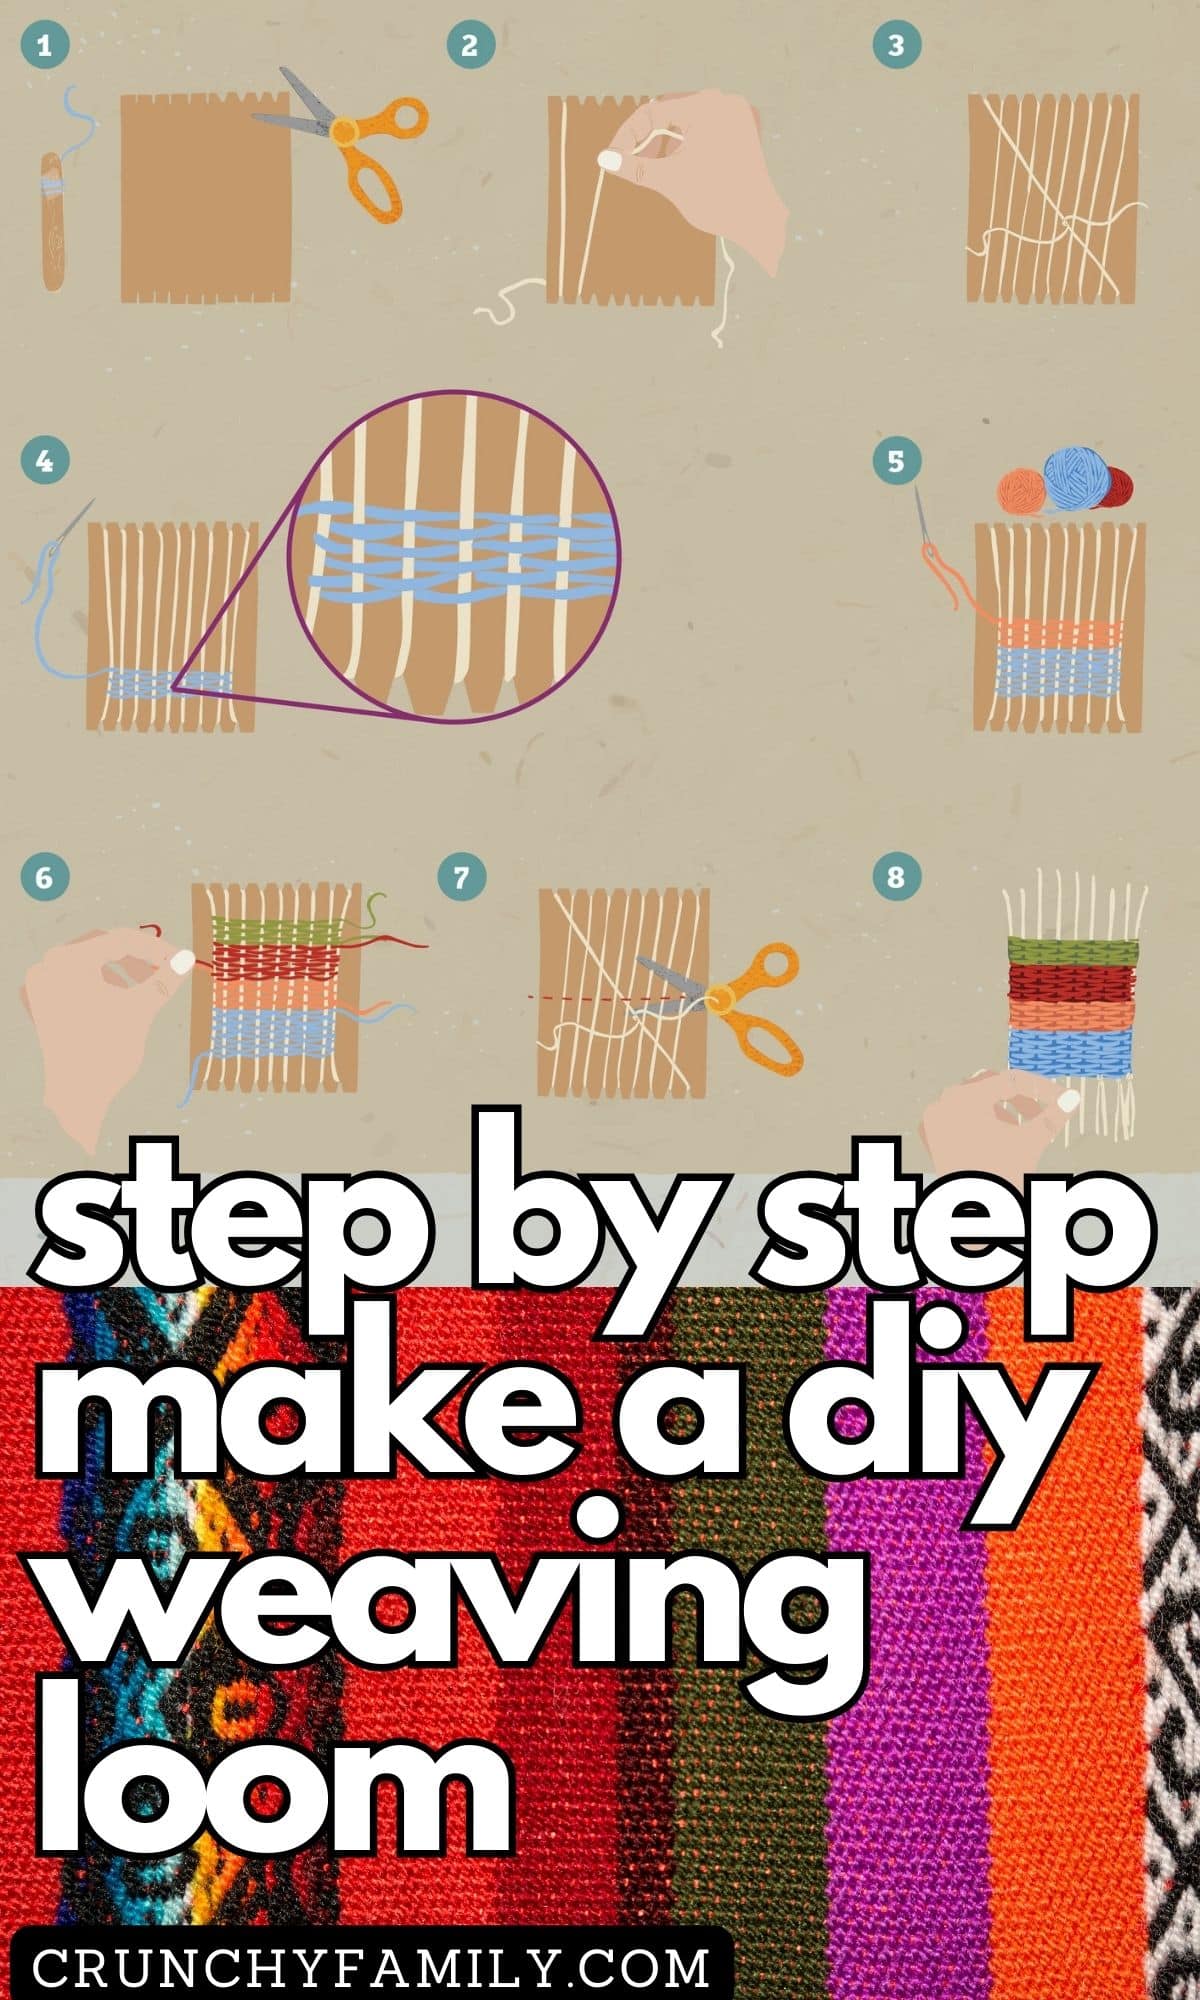
- Use a pencil and ruler to make small marks 3/4in (1cm) apart along the top and bottom of the cardboard. Snip a small notch at each mark.
- Now you can attach your warp yarn. Cut a 9ft 2in (280 cm) long piece of yarn and slide it through the bottom left notch, leaving an 8in (20cm) long ‘tail’. Take the yarn up to the matching slit at the top of the loom, then bring it down the back of the loom to the second slit. Continue winding your yarn all the way around the loom.
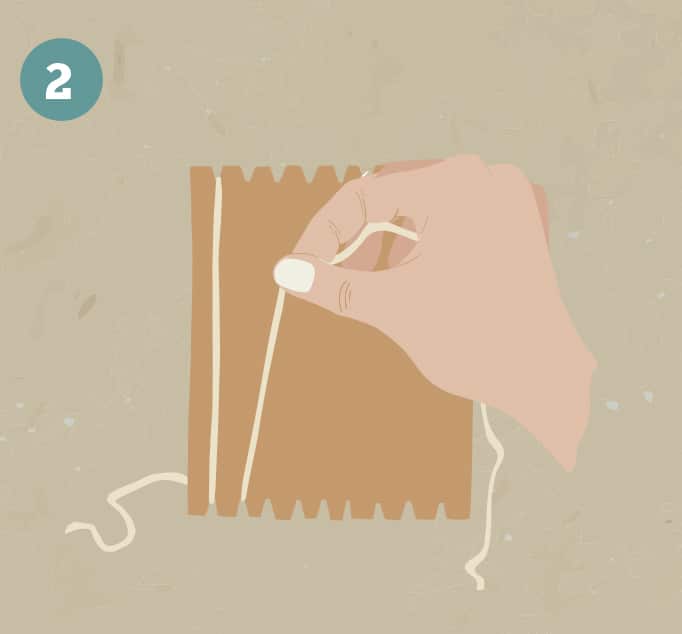
- When you are finished, tie the two ends of the yarn together with a knot at the back of the loom.
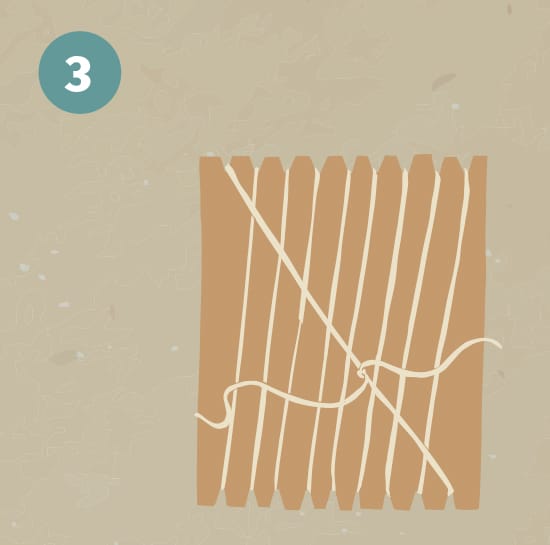
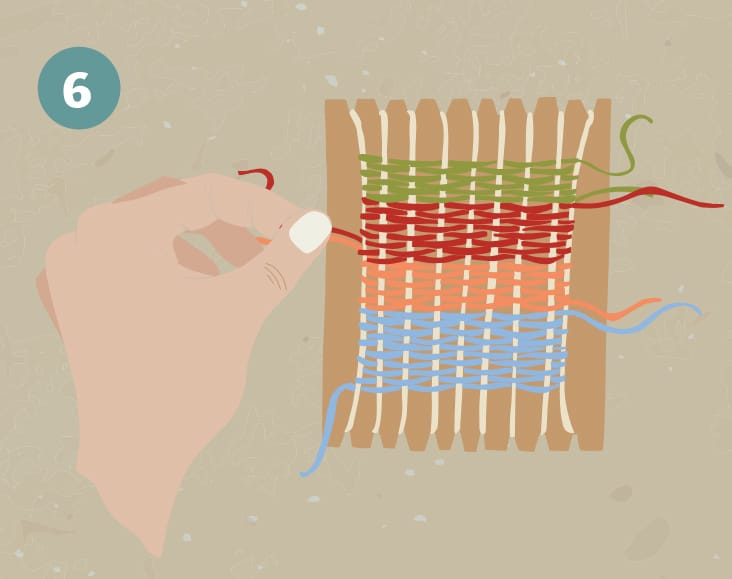
- Now you are ready to start weaving your weft threads. Thread your needle with yarn – around 20in (50cm) is a good length to avoid tangles. Starting at one side of the loom, thread the needle over and under the warp threads. Continue back and forth across the loom to create more rows. After each row, gently push down the yarn using your fingers.
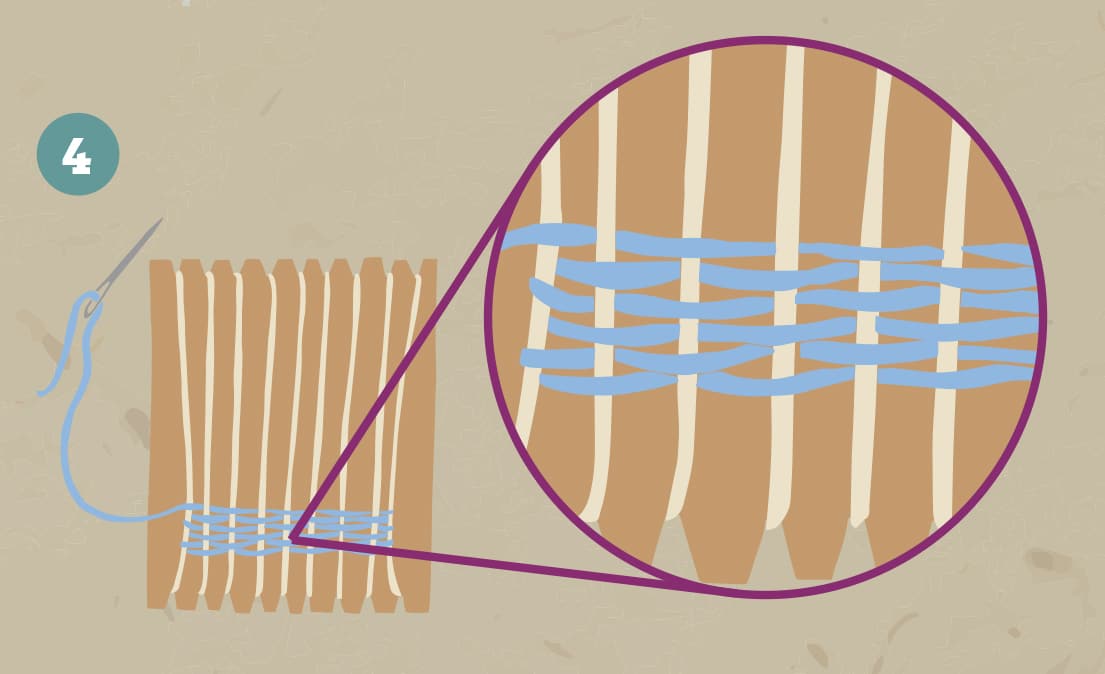
- When the yarn nearly runs out, finish the row you are on. Then choose a new colour to start the next row. When you finish or start a colour, make sure you leave the ends of the yarn long enough so that you can knot them together later.
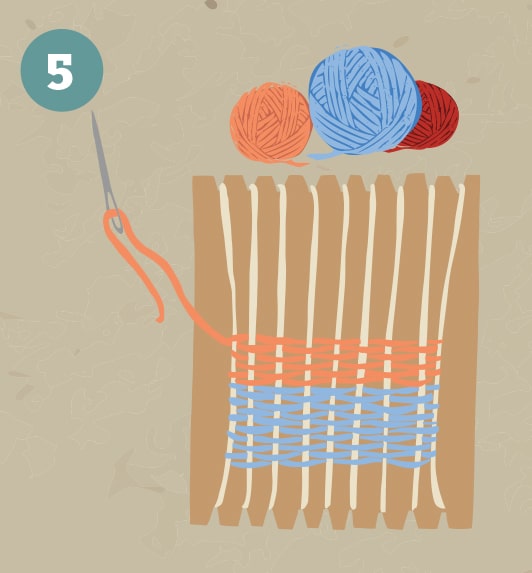
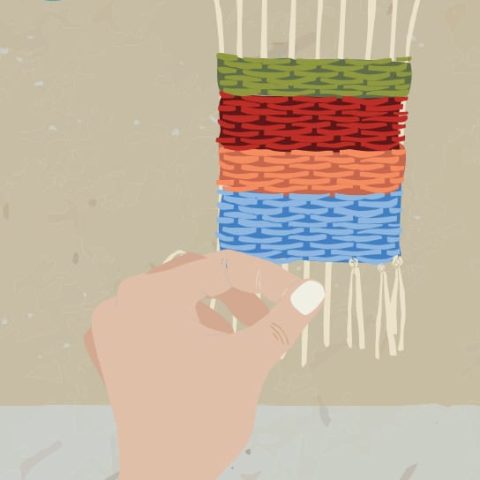
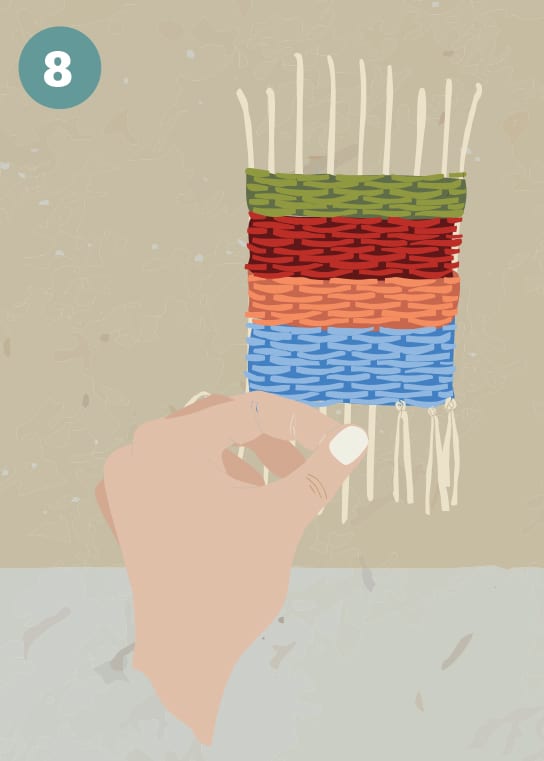
- Keep weaving, changing colour when you like, until your loom is full. Then tie together the pairs of loose ends at the edges of your cloth, using double knots. Snip off the ends.
- To remove your weaving from the cardboard, cut through the warp threads at the back of the loom.

- Finally, tie together all the loose ends at the top and bottom of the cloth, by knotting them in twos. Your weaving is complete!
Incorporating traditional crafts like weaving into your family’s activities has numerous benefits. It’s not just about creating something beautiful; it’s also about teaching patience, developing fine motor skills, and fostering a sense of accomplishment.
Weaving on a DIY cardboard loom is a wonderful way to introduce children to this ancient art. They’ll learn about the importance of warp and weft threads, experience the tactile joy of working with yarn, and create their own wall hangings or useful cloth pieces.

Creating a diy weaving loom from cardboard is an easy and cost-effective way to dive into this craft. Using simple materials like yarn, cardboard, and a darning needle, you can set up a diy loom in no time.
This activity is perfect for a rainy afternoon or a weekend project and provides a great opportunity for kids to practice following instructions step by step.
Live Like a Viking Book
Live Like a Viking is a fascinating and informative journey back in time to find out what it was really like to live in the Viking age. Dotted throughout are fictional accounts by a young girl that bring the Viking era to life and enable readers to understand what it was like to live like a Viking.
The Vikings have a fearsome reputation as warriors. In reality, they were much more than that. From farmers and craftsmen to musicians and explorers, Viking society and culture has left a lasting impression on our modern world.
At the peak of their power, the Viking population soared to two million! Get ready to discover what it was like to live in this epic era. Learn about out how these master seafarers invaded countries across Europe using iconic wooden longships, about family life, their beliefs, the place of women in society, how they dressed and what they ate, as well as their language, customs and rituals.
The book also includes step-by-step craft activities and recipes to have a go at.
This project is featured with permission from the book Live like a Viking.
Live like a Viking by Claire Saunders, illustrated by Ruth Hickson, Button Books, RRP £12.99, available online & from all good bookshops
Exploring traditional crafts like weaving helps keep these skills alive and relevant. Not only does it offer a creative and educational activity for families, but it also connects us to the past in a tangible way. So, gather your materials, set up your cardboard loom, and enjoy the rewarding process of weaving your own piece of cloth. Happy weaving!
More Hands on Activities for Kids
Engaging children in hands-on activities is a wonderful way to promote calmness and grounding, helping them feel more regulated and focused.
From crafting and DIY projects to nature explorations, these activities offer a break from screens and stimulate creativity and fine motor skills.
Discover even more enriching and fun projects beyond this homemade loom here on CrunchyFamily.com, where you can find a variety of ideas to keep your kids engaged and thriving. Explore our links below for more inspiration!
- How To Make A Simple Bird Bath With Kids
- Make An Ant Farm Science Project For Kids
- 7 Hands On Butterfly Activities for Wild Kids
- Nature Activities for Kids
- DIY Forest School Campfire Popcorn Maker
Sharing your crafting journey can be part of the fun. Platforms like Instagram and Pinterest are brimming with inspiration and communities of fellow crafters.
If you enjoyed this homemade weaving loom tutorial please share this loom making blog post, and go ahead and show off your DIY weaving projects, learn from others, and get ideas for your next creation.
Whether you’re making a small wall hanging or a larger cloth, each piece you weave tells a story of creativity and tradition.
3 thoughts on “How to Make a Weaving Loom with Kids”